What is Taxonomy?
Taxonomy means to classify something, usually with a label. In the case of Leap, taxonomies define a set of keys within a data structure that are domain-specific. In plain terms, applying a taxonomy template to a set of data allows you to change the names of the data keys so that they are better understood by the users and systems of a specific vendor.
For example, in Wisconsin, USA people often refer to a drinking fountain as a “bubbler”. However, most other regions just refer to it as a drinking fountain. In a JSON or XML dataset, we could apply a taxonomy template to change all the occurrences of “waterFountain” to “bubbler” so that Wisconsinites could understand the data.
{
    "data": {
        "waterFountain": {
            "id": "001",
            "location": "23rd & 3rd"
        }
    }
}
{
    "waterFountain": "bubbler",
    "location": "address"
}
{
    "data": {
        "bubbler": {
            "id": "001",
            "address": "23rd & 3rd"
        }
    }
}
How Does it Work?
Taxonomy files for Leap Features are JSON files and belong in the feature-specific configuration directory of the respective Feature it applies to. The file must follow the naming convention:
<name>_Taxonomy.json
Notice that this convention is used in the sample taxonomy file in the above example.
When Leap parses the Taxonomy JSON file, it considers the key as the original value in the inbound Request data and the value as the new key name to apply. It will apply this to all keys found recursively within the inbound data.
How Leap Handles Taxonomy
The Leap framework supports applying Taxonomy at two different levels:
- HTTP Request Level
- Feature Level
There are scenarios where a Taxonomy needs to be applied right away once Leap receives Request data. Yet, there are also cases where a single Taxonomy should not apply to all requests and should instead be applied within a vendor-specific Feature implementation.
Request Level Taxonomy
Applying a Taxonomy at the HTTP Request level means that the data is transformed immediately in the BaseRoute, prior to the request reaching a specific Feature Execution Route. This is important for cases where a Taxonomy needs to be applied like a blanket, on the Request data prior to ANY Feature Routes. Yet, the mentioned Taxonomy is only applied to the specific HTTP Request, not subsequent Requests.
You may choose to do this for several reasons:
- if there are reserved keywords within the incoming request body
- mispelled keywords on the incoming request body
- pre-optimize data keys for processing across multiple Feature Routes
In order to indicate to Leap that you’d like to apply a specific Taxonomy, the originator of the data (sender) needs to provide the name of the taxonomy to apply with a custom HTTP header taxonomy_id.
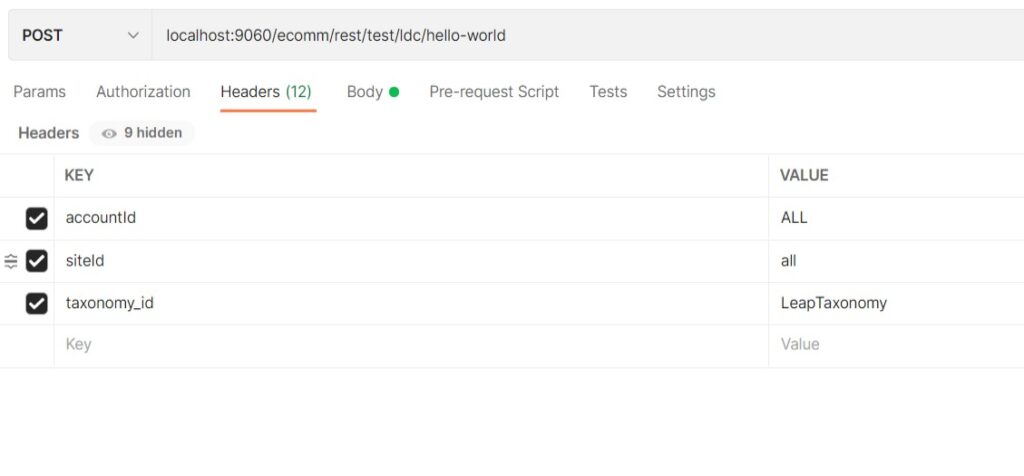
The value of the taxonomy_id will be used to look up the Taxonomy file within the profile configuration directory:
attunedlabs/config/local/<taxonomy_id>_Taxonomy.json
Feature Level Taxonomy
Applying a Taxonomy at the Feature level means that the Request Data will not be changed until the data reaches a Feature Implementation Route. By doing this, the Taxonomy should be applied just prior to any custom logic in the Implementation Routes being called.
This approach allows for different taxonomies to be applied in the case that a Feature is a specific vendor implementation and requires a custom Taxonomy for that vendor. As an example, one vendor may refer to a box in the warehouse as a crate, carton, or box.
If each of the respective vendors prefers a certain term, the Taxonomy will be applied only to the services within the scope of the vendor implementation.
To apply a Taxonomy at the Feature level, you must include the optional vendorTaxonomyId attribute in the featureMetaInfo.xml file of the respective Feature.
Then, in your Implementation Route, you must opt-in to applying the Taxonomy to your data by referencing leapDataContextConfigHelper bean methods to fetch the Taxonomy ID and apply the Taxonomy template, see the example implementation route below.
<?xml version="1.0" encoding="UTF-8" standalone="no"?>
<Feature-Metainfo
	xmlns:fms="http://attunedlabs.com/internal/FeatureMetaInfoSupporting"
	xmlns:xsi="http://www.w3.org/2001/XMLSchema-instance" productVersion="WMS2.0" xsi:noNamespaceSchemaLocation="featureMetaInfo.xsd">
	<FeatureGroup>
		<Name>test</Name>
		<Features>
			<Feature implementationName="demo" vendorName="attunedlabs" vendorVersion="1.0" vendorTaxonomyId="demoTax">
				<Name>ldc</Name>
				<FeatureImplementations>
					<FeatureImplementation resourceName="ldc-demo-featureservice.xml"/>
				</FeatureImplementations>
			</Feature>
		</Features>
	</FeatureGroup>
</Feature-Metainfo>
{
    "message": "value"
}
<?xml version="1.0" encoding="UTF-8" standalone="no"?>
<beans
	xmlns="http://www.springframework.org/schema/beans"
	xmlns:camel="http://camel.apache.org/schema/spring"
	xmlns:cxf="http://camel.apache.org/schema/cxf"
	xmlns:http="http://cxf.apache.org/transports/http/configuration"
	xmlns:sec="http://cxf.apache.org/configuration/security"
	xmlns:soap="http://cxf.apache.org/bindings/soap"
	xmlns:xsi="http://www.w3.org/2001/XMLSchema-instance" xsi:schemaLocation=" http://www.springframework.org/schema/beans    http://www.springframework.org/schema/beans/spring-beans.xsd http://camel.apache.org/schema/spring    http://camel.apache.org/schema/spring/camel-spring.xsd http://www.springframework.org/schema/context   http://www.springframework.org/schema/context/spring-context.xsd http://camel.apache.org/schema/cxf    http://camel.apache.org/schema/cxf/camel-cxf.xsd http://cxf.apache.org/transports/http/configuration   http://cxf.apache.org/schemas/configuration/http-conf.xsd http://cxf.apache.org/configuration/security   http://cxf.apache.org/schemas/configuration/security.xsd">
	<routeContext
		xmlns="http://camel.apache.org/schema/spring" id="ldc-demo-implementation-route">
		<route id="hello-world-implEnrchimentRoute">
			<from uri="direct:ldc-hello-world-ImplementationEnrichmentRoute"/>
			<to uri="direct:ldc-hello-world-IR"/>
		</route>
		<route id="hello-world-implRoute">
			<from uri="direct:ldc-hello-world-IR"/>
			<to uri="bean:leapDataContextConfigHelper?method=getVendorTaxonomyId" />
			<to uri="bean:leapDataContextConfigHelper?method=applyTaxonomyToExchangeBody(${in.header.TaxonomyId})" />
			<to uri="direct:ldc-hello-world-executionExitRoute"/>
		</route>
	</routeContext>
</beans>
<!-- all of the following are different methods to call in order to apply taxonomy from a route. It's up to you to choose the appropriate method based on the situation -->

<!-- Apply Taxonomy to the body of Exchange -->
<to uri="bean:leapDataContextConfigHelper?method=applyTaxonomyToExchangeBody(${in.header.TaxonomyId})" />

<!-- Apply Taxonomy to the body of the Exchange and put the result into LDC -->
<to uri="bean:leapDataContextConfigHelper?method=applyTaxonomyAndPushToLDC(${in.header.TaxonomyId}, '#afterTaxonomy')" />

<!-- Apply Taxonomy to data in LDC and put the result back into LDC -->
<to uri="bean:leapDataContextConfigHelper?method=applyTaxonomyWithLDC(${in.header.TaxonomyId}, '#originalData', '#afterTaxonomyData')" />
In the screenshot below, I am sending a plain Leap Request payload where the only data field is the message field. However, as configured above; I want my Implementation Route to use the term value instead of message.
Because I’ve mentioned the vendorTaxonomyId as demoTax, Leap will expect that a file named “demoTax_Taxonomy.json” exists within the Feature resources.

Taxonomy In Leap Entity
Finally, Taxonomy can also be applied as part of the Entity process. However, this taxonomy will only impact the specific data associated with the single Service that has been called. We will cover this more thoroughly in the Leap Entity documentation (coming soon).